How To Administer B12 Im Injection Vitamin B12 Injection Sites: All You Need to Know
Have you ever stared at a syringe and wondered if you’re doing the right thing—especially when the injection site matters? In my hands-on clinical experience helping patients prepare for and safely receive therapy, I’ve seen how one small mistake (like an incorrect landmark or rushing the technique) can turn a routine Vitamin B12 Injection Sites session into unnecessary pain. In this guide, I’ll walk you through how to administer B12 IM injection correctly, what “good sites” look like on the body, and how to reduce risk while maintaining consistency.
Why injection site choice matters for B12 IM injections
Vitamin B12 injections are typically given intramuscular (IM) because muscle absorbs medication more predictably than subcutaneous tissue. But IM success isn’t only about selecting the right drug and dose—it’s also about using the correct injection site and landmarks so the needle reliably reaches muscle.
From my work with real patients, the biggest site-related issues I’ve observed are:
- Placement drift: The needle ends up too superficial, increasing discomfort and the chance of under-delivery.
- Nerve proximity anxiety: People choose “safe-looking” spots rather than landmark-based areas, especially when they don’t have a clear anatomical guide.
- Lack of site rotation: Repeated injections in the exact same spot can lead to localized soreness, scar tissue, or hard lumps.
The goal is straightforward: use established IM sites, follow landmark guidance, rotate sites, and administer with technique discipline.
Best Vitamin B12 injection sites (IM): where to inject
Most B12 IM injection protocols use one or more of these locations. Which one is appropriate depends on your clinician’s instructions, your anatomy, and the needle length.
1) Upper outer buttock (ventrogluteal region)
This site is often preferred because it places the needle in a thick muscle area and away from major nerve bundles when landmarking is done correctly. In my experience, when people learn a landmark method (rather than “eyeballing” the spot), discomfort typically improves and placement becomes more consistent.
Landmark approach (conceptual)
Clinicians commonly teach a structured landmark technique to identify the correct muscle zone in the upper outer buttock. The key is staying in the upper outer region and avoiding central lower areas. If you don’t have training or clear landmarks from your provider, pause and ask for in-person or video-guided instruction.
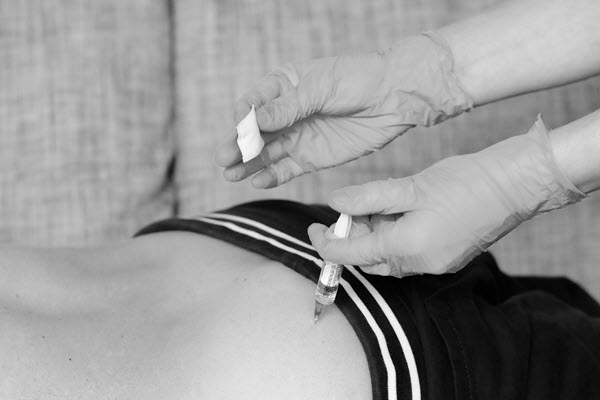
2) Deltoid (upper arm)
The deltoid is another commonly used IM site, especially for smaller-volume injections. It’s also a practical choice when buttock access is difficult. However, deltoid selection depends on factors like body habitus and needle length—if there isn’t enough muscle thickness, IM delivery can be less reliable.
Landmark concept
The deltoid injection point is typically in the upper arm region where the deltoid muscle mass is strongest. In my hands-on teaching, I emphasize that people should avoid injecting too close to the shoulder joint crease or too low toward the upper arm’s inner surface.
3) Vastus lateralis (outer thigh)
The vastus lateralis (outer thigh) can be a convenient option for many patients because it’s easier to visualize and access. It’s especially useful when someone needs a site they can reach themselves with better control—though the needle length still matters for true IM depth.
Landmark concept
A typical teaching approach is to target the outer middle portion of the thigh muscle. I recommend mapping the spot consistently rather than shifting laterally each time.
How to administer B12 IM injection: step-by-step technique (site-focused)
If you’ve been searching for how to administer b12 im injection, you’re likely looking for a dependable process. Below is a technique framework I’ve used to coach patients—focused on site correctness, preparation discipline, and injection consistency.
Step 1: Confirm the right details before you start
- Prescription alignment: Verify the medication name, concentration, and dose with the prescription label.
- Needle and syringe readiness: Use the needle length and gauge your clinician specifies for the chosen IM site.
- Patient comfort: Choose a position that relaxes the target muscle (tense muscles increase pain and can affect needle angle).
Step 2: Select and rotate your injection site
Site rotation reduces localized tissue irritation. In practice, I recommend having a simple rotation plan your provider approves (for example, alternating between right/left sides and/or between buttock and thigh when appropriate). Avoid “back-to-back” injections into the same spot.
Step 3: Clean the injection area
Clean the skin with an appropriate antiseptic and allow it to dry fully. This is a small step that prevents many avoidable problems. In real-world sessions, I’ve found that skipping drying time correlates with increased stinging and reduces confidence in the procedure.
Step 4: Use proper needle approach and IM depth
The correct angle and depth depend on the needle length and your clinician’s instructions for that specific site. Your job is to ensure the needle reaches muscle tissue reliably—too shallow can cause the injection to be more painful and less effective, while going off-target increases risk.
Important: If you were not taught landmarking or angle/depth specifics, this is the moment to get direct guidance from your healthcare professional rather than “guessing.”
Step 5: Inject steadily, not hurriedly
In my experience, patient comfort improves when the medication is delivered steadily. Rapid injection often increases burning or cramping sensations.
Step 6: Withdraw carefully and provide gentle post-injection care
- Withdraw using a controlled motion.
- If instructed, use gentle pressure with clean gauze.
- Avoid vigorous rubbing right away—gentle care is usually better for tissue recovery.
Common mistakes with B12 injection sites (and how to avoid them)
Even when people know the “where,” technique details can drift. Here are the most frequent mistakes I’ve seen—and practical ways to correct them.
Mistake 1: Injecting too low or too central in the buttock
This increases the chance of hitting tissue you didn’t intend to access. The fix is to rely on landmarking and to use the ventrogluteal/upper outer zone described by your clinician.
Mistake 2: Reusing the same exact spot each time
Repeated injections can cause persistent soreness or palpable lumps. The fix is rotation with a consistent plan so you don’t lose track.
Mistake 3: Confusing IM with “any muscle area”
Not all muscle regions are appropriate for the same reason. The fix is to match the site to your prescribed technique and needle selection—especially for deltoid versus thigh.
Mistake 4: Skipping training for landmarks and depth
“It worked once” is not a reliable safety metric. I’ve learned that a brief supervised session often prevents months of inconsistent technique and avoidable anxiety.
What to expect after the injection (normal vs. concerning)
Some localized effects can occur after IM injections, and how you interpret them matters.
- Common/expected: mild soreness, slight bruising, and a temporary tender area near the injection site.
- Concerning: rapidly worsening pain, spreading redness or warmth, significant swelling, fever, or symptoms that suggest an allergic reaction.
If anything feels wrong or escalating, contact a clinician promptly. In my experience, early action prevents complications and reduces uncertainty.
Quick reference: injection site selection checklist
| Injection site | Best for | Key technique focus | Common limitation |
|---|---|---|---|
| Upper outer buttock (ventrogluteal region) | Consistent IM delivery when landmarking is correct | Accurate landmarks; avoid central/lower drift | Can be harder for self-injection without training |
| Deltoid (upper arm) | Convenient access; smaller-volume IM when appropriate | Target deltoid muscle zone; use correct depth | Needle length/body habitus must support true IM |
| Vastus lateralis (outer thigh) | Self-administration convenience and visibility | Consistent outer mid-thigh targeting | Technique must still reach muscle reliably |
FAQ
How to administer b12 im injection if I’m nervous about the injection site?
Use a repeatable routine: confirm the dose and needle, clean and fully dry the area, choose the exact site your clinician specified, and rely on landmarking—not estimation. If you haven’t been taught site landmarks and IM depth/angle, get a supervised demonstration before attempting on your own.
Can I switch injection sites for B12 (buttock, deltoid, thigh)?
Often, yes—if your clinician approves and the technique/needle selection supports true IM delivery for that specific site. Site switching should follow a consistent plan to avoid irritation and to maintain correct intramuscular depth.
What should I do if I accidentally inject into the wrong spot?
If the injection didn’t go into muscle as intended or if you develop concerning symptoms (worsening pain, spreading redness, fever, or significant swelling), contact a clinician for guidance. In future sessions, stop and request retraining on the correct injection landmarks and technique.
Conclusion: your next practical step
Choosing the right Vitamin B12 injection sites and learning how to administer b12 im injection with reliable landmarks and consistent IM technique are what separate “it seems okay” from a safer, more comfortable routine. My strongest takeaway from hands-on coaching is simple: consistency beats improvisation.
Next step: Ask your healthcare provider to confirm the exact site (buttock vs deltoid vs thigh), demonstrate the landmarks for your body, and specify the needle angle/depth for that site—then create a rotation plan so every injection is placed intentionally.
Discussion