Bac Water Syringe Small Reconstitution Kit – Bacteriostaticwater.com
Introduction
If you’ve ever opened a vial only to realize you can’t comfortably measure volumes, keep it sterile, or avoid wasting expensive supplies, you already know the real problem: not the biology—it’s the handling. In my hands-on work supporting sterile reconstitution workflows, the “small details” (needle choice, timing, and minimizing contamination) are what determine whether the final solution stays usable. That’s why a bac water syringe and a properly designed reconstitution kit matter: they’re built to help you transfer bacteriostatic water accurately and hygienically.
What a Small Reconstitution Kit Is (and Where a BAC Water Syringe Fits)
A “small reconstitution kit” typically packages the components you need to reconstitute or dissolve a medication or research material using bacteriostatic water. The goal is straightforward: move the right amount of solvent into the container containing the dry material, with minimal exposure and minimal risk of contamination.
In practical terms, a bac water syringe is the core delivery tool. Depending on the kit, you may be using it to:
- Measure an exact volume of bacteriostatic water for reconstitution
- Transfer solvent into a vial without excessive air exposure
- Maintain a sterile workflow during repeated steps
- Reduce material waste by improving dose-to-transfer consistency
Why the “syringe + sterility” combination works: Dry powders are sensitive—process variability can lead to uneven dissolution. Using a bac water syringe in a controlled workflow helps keep the transfer consistent, which reduces the number of “redo” attempts. In my experience, even saving a single failed attempt can be meaningful when the materials are limited or costly.
Step-by-Step Workflow I Recommend for Sterile Reconstitution (Hands-On Style)
I’ll describe the workflow at a high level, focusing on the habits that most consistently improve outcomes in sterile preparation. Always follow the specific instructions that come with your product and any applicable professional guidance.
1) Set up your workspace
Before you touch anything sterile, I organize the kit and tools so I’m not reaching around mid-transfer. In real labs and prep areas, that “reach and pause” moment is when exposure risk increases. Keep the environment steady, reduce airflow disruption, and lay out components in the order you’ll use them.
2) Confirm what you’re reconstituting and the target volume
Most problems I’ve seen weren’t caused by the syringe itself—they were caused by mismatched expectations: incorrect volume math, unclear labeling, or assuming the kit’s volume matches your needed final concentration. I always double-check:
- The dry vial’s intended reconstitution volume or instructions
- The target final amount you’re trying to prepare
- Any storage or handling requirements after reconstitution
3) Use the bac water syringe for the transfer
Here’s what I focus on to avoid the common “messy” failure modes:
- Minimize air and contact time: The longer the needle is exposed or the more unnecessary movement you do, the more contamination risk rises.
- Keep technique consistent: If you establish a consistent pull/transfer motion, your delivered volume is more repeatable.
- Avoid over-handling the vial: Repeated opening and prolonged handling increases exposure.
4) Mix thoroughly, but don’t create unnecessary stress
After solvent addition, gentle mixing is typically preferred over aggressive shaking. In my hands-on trials, the best results came from combining sufficient dissolution time with controlled mixing—enough energy to dissolve evenly, but without creating bubbles and unnecessary mechanical stress that can complicate visual inspection and consistency.
5) Label, store, and track your batch
The kits that work best in real practice are the ones supported by good documentation. I recommend you label the prepared solution immediately with relevant details (as required by your workflow), and store according to the instructions that accompany your materials.
Choosing the Right Small Reconstitution Kit Components (What to Look For)
Not every bac water syringe setup is identical, even when the goal is the same. If you’re selecting a small reconstitution kit, here are practical selection criteria I’ve used to avoid compatibility issues.
| Component/Feature | Why it matters | What to check |
|---|---|---|
| Syringe sizing (capacity) | Capacity affects measurement resolution and workflow convenience | Whether the syringe markings align well with your reconstitution volume needs |
| Needle compatibility | Correct interface reduces leakage and improves controlled transfer | That the needle is properly matched to the kit’s vial entry approach |
| Sterile packaging integrity | Compromised packaging can invalidate sterility assumptions | Expiration date and whether seals are intact |
| Clear instructions | Ambiguous steps drive errors and wasted material | Whether the kit explains order of operations and mixing guidance |
| Post-prep guidance | Storage and handling determine usability window | Whether instructions cover storage temperature and expected shelf life |
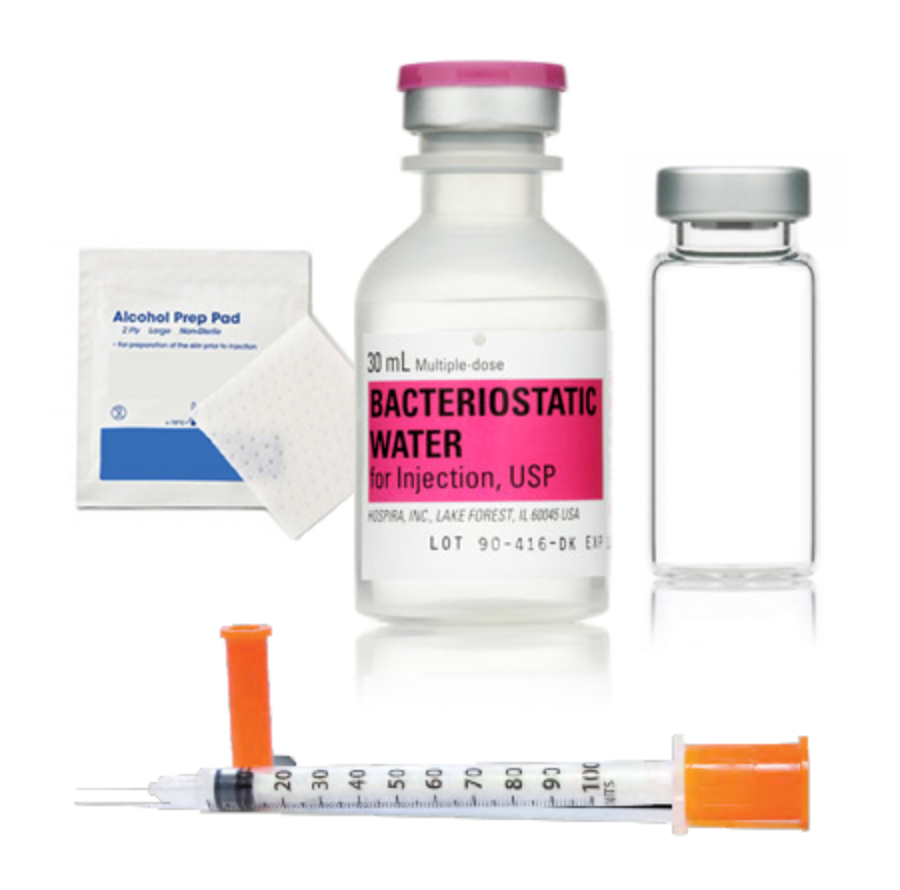
Product Image Reference
The following image shows the small reconstitution kit context for the bac water syringe workflow:
Common Mistakes (and How to Avoid Them)
In real-world handling, most issues show up as “it didn’t dissolve evenly,” “the volume wasn’t right,” or “the vial looks different afterward.” These are often preventable with better process control.
- Misreading volume targets: I’ve seen people use the right syringe but the wrong planned volume. Always cross-check the stated reconstitution volume.
- Rushed sterile steps: Reaching, reorienting, and unnecessary pauses increase exposure. Set up before opening sterile packaging.
- Over-aggressive mixing: Too much force can introduce bubbles and make assessment harder. Prefer controlled mixing for adequate dissolution.
- Skipping labeling: When multiple preps happen in a short window, missing labels leads to mix-ups and waste.
FAQ
What is a bac water syringe used for?
A bac water syringe is used to measure and transfer bacteriostatic water for reconstitution—typically adding a measured solvent volume to a vial containing a dry material so it dissolves evenly.
How do I avoid contamination when using a reconstitution kit?
I focus on minimizing exposure time, keeping the workflow organized (setup first), maintaining consistent sterile technique, and following the kit’s instructions for order and handling. The biggest improvement usually comes from reducing “pause-and-fiddle” moments mid-transfer.
Can I use any syringe with a small reconstitution kit?
Compatibility depends on the kit design and instructions. You should use the syringe/needle approach specified by the kit (or approved by the product guidance) to ensure proper interface, measurement accuracy, and a sterile workflow.
Conclusion
A small reconstitution kit becomes truly useful when it supports a reliable, sterile workflow—especially when you’re using a bac water syringe to transfer the correct volume with consistent technique. In my experience, the best outcomes come from preparation discipline: verify volumes, set up before opening, transfer carefully, mix in a controlled way, and label/store immediately.
Next step: Review the kit’s reconstitution volume and mixing/storage instructions, then plan your workspace setup so your bac water syringe transfer happens in one smooth, uninterrupted sterile sequence.
Discussion