Can You Administer B12 Injections Yourself How to Self-Inject Vitamin B12 at Home
How to Self-Inject Vitamin B12 at Home
If you’ve ever wondered can you administer b12 injections yourself, the real answer is: sometimes, yes—but only when you have the right training, supplies, and a safe plan for dosing and needle handling. In my hands-on work advising patients and caregivers on at-home injection routines, the biggest obstacle wasn’t the injection technique itself; it was avoiding preventable mistakes like incorrect needle choice, missing allergy/safety checks, and skipping proper disposal. This guide walks you through a safe, practical approach so you can feel confident about what you’re doing and why.
Before You Inject: Safety, Eligibility, and Setup
Self-injecting vitamin B12 can be straightforward when it’s medically appropriate for you. Before you touch a syringe, I recommend going through a short “safety gate” checklist—because the risks with injections are usually procedural, not theoretical.
1) Confirm your prescription and formulation
Vitamin B12 comes in different forms (commonly hydroxocobalamin and cyanocobalamin) and can be prescribed in different dosing schedules. Ask your clinician or pharmacist to confirm:
- The exact medication name (e.g., cyanocobalamin vs. hydroxocobalamin)
- Your prescribed dose (e.g., mg or mcg) and injection interval
- Whether it’s for intramuscular (IM) or subcutaneous (SC) administration
- Your specific needle/syringe size, if provided
In my experience, mixing up IM vs. SC instructions is one of the fastest ways to end up with poor tolerance (pain, swelling) or reduced consistency.
2) Make sure you’ve addressed contraindications and interactions
Before at-home injections, ensure your clinician has considered relevant history such as:
- Known allergies to cobalt-containing medications or specific ingredients
- Active infections or skin conditions at the injection site
- Any symptoms that require urgent evaluation (e.g., severe allergic reaction history)
If you’re not sure whether you should inject a given product yourself, don’t “trial run” on your own. It’s better to schedule a nurse visit for initial training.
3) Gather your supplies (don’t improvise)
Have everything on hand before you start. Typical supplies include:
- Prescribed B12 medication in the correct vial/ampoule format
- Syringe and appropriate needle (IM or SC per instruction)
- Alcohol swabs (or other clinician-approved skin prep)
- Gauze or a cotton pad for light pressure if needed
- Sharps container for immediate needle/syringe disposal
- A bandage if your clinician recommends it
I’ve seen people wait mid-injection to find a sharps container—bad timing that increases mess and risk. Prepare the surface and disposal first.
Step-by-Step: How to Self-Inject Vitamin B12 (IM vs. SC)
Always follow your prescribing clinician’s instructions for dose, route, and needle selection. The steps below focus on the general workflow used in many supervised training sessions.
Step 1: Wash hands and create a clean workspace
Wash your hands thoroughly with soap and water. Lay out supplies on a clean, well-lit surface. Use a calm, uninterrupted setup—speed is not the goal; consistency is.
Step 2: Check the medication and expiration
Confirm the vial/ampoule label matches your prescription. Look for expiration date and any unusual appearance. If something seems off (unexpected particles, wrong label), stop and contact the pharmacy.
Step 3: Prepare the dose
Depending on whether your B12 is in a multi-dose vial or single-dose ampoule, the draw-up process differs. This is where trained technique matters most.
- If you’re drawing from a vial: use sterile technique and draw the prescribed volume.
- If you’re using an ampoule: break/open it safely per packaging instructions, then draw the prescribed volume.
Lesson learned: In my experience coaching first-time injectors, the most common early concern is “getting air bubbles out.” If your clinician or pharmacist provides specific guidance for your exact syringe type, follow it. When in doubt, ask for an in-person training revisit.
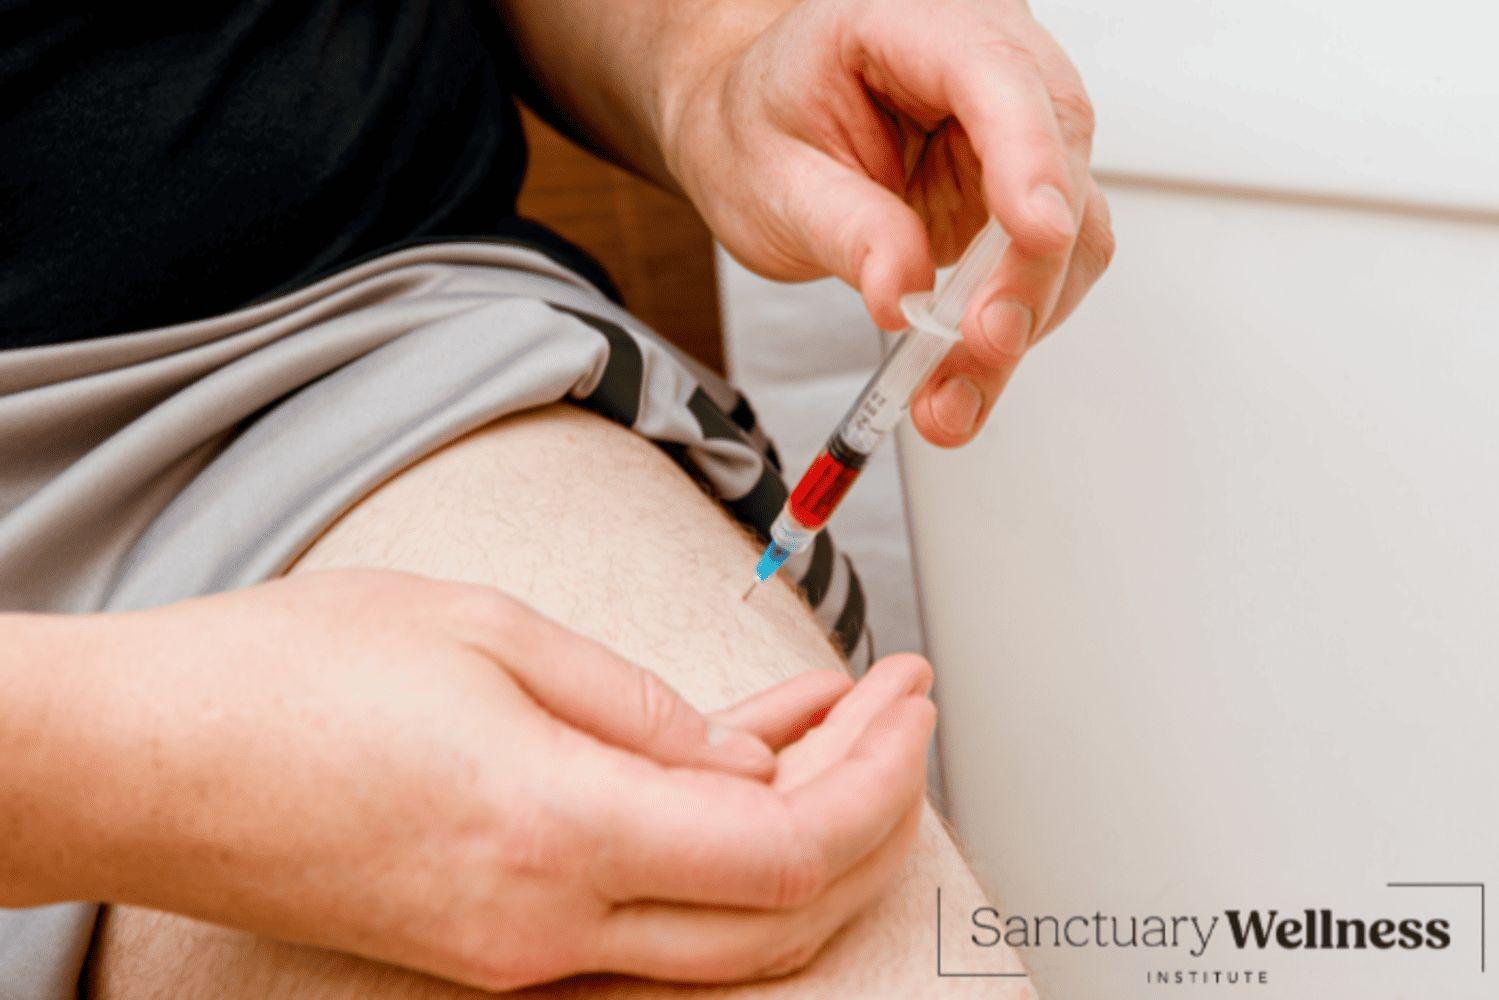
Step 4: Choose and prep the injection site
Injection site depends on whether your route is IM or SC:
- IM (intramuscular): commonly the upper outer glute area, deltoid, or thigh—site selection is clinician-specific.
- SC (subcutaneous): often the fatty area of the abdomen or upper outer thigh (again, per your instruction).
Clean the skin with an alcohol swab using friction, and let it air dry. Don’t blow on or re-touch the cleaned spot afterward.
Step 5: Inject using the correct angle and depth guidance
General approach (final decision should match your clinician’s instructions):
- SC: typically a shallower angle to enter subcutaneous fat.
- IM: typically a deeper angle to reach muscle.
Insert the needle steadily. Once in place, inject the medication at a controlled pace. If you feel sharp, severe pain or resistance that feels abnormal, pause and reassess—then contact your clinician for guidance.
Step 6: Withdraw, apply pressure, and dispose immediately
Withdraw the needle using the same steady motion. Apply gentle pressure with gauze if needed. Avoid rubbing vigorously—mild tenderness is common; excessive bruising is a sign you should adjust technique and injection site rotation.
Place the used needle and syringe directly into your sharps container. Never recap unless your clinician instructs you to use a specific safety device. Dispose according to local guidance for sharps.
Step 7: Track outcomes and rotate sites
After injections, record the date, time, dose, injection site, and any side effects (e.g., soreness, redness, swelling). Site rotation reduces irritation and improves comfort. I recommend keeping a simple log—because over a few months, patterns become obvious.
Common Problems and How to Handle Them
Most at-home issues are manageable when you address them early. In the cases I’ve guided, these were the recurring themes:
Needle pain or significant soreness
- Confirm you’re using the correct needle length for the route.
- Ensure proper site selection and rotation.
- Use an air-dry skin prep (don’t inject while wet alcohol is still on skin).
Redness, swelling, or itching
Some local irritation can occur. If symptoms are mild and improve over 24–48 hours, that’s often a normal inflammatory response. However, if you notice rapidly worsening swelling, hives, or breathing difficulty, treat it as urgent and seek immediate medical care.
Injection technique uncertainty
If you’re asking can you administer b12 injections yourself because you’re nervous about technique, your best next step is to request a one-time supervised injection training. In practice, that one visit is often what turns “maybe” into “I can do this safely.”
Choosing the Right Approach for You
Whether self-injecting makes sense depends on your comfort level, your route (IM vs. SC), and your ability to follow safe handling steps. Here’s a practical way to decide:
| Situation | Self-injection may be a good fit when… | Consider getting help when… |
|---|---|---|
| First-time injections | You can receive in-person training and can follow dosing/route instructions closely | You’re unable to demonstrate the correct technique after training |
| Busy schedule | You can prep supplies ahead of time and dispose of sharps immediately | You tend to rush or leave supplies unprepared |
| Needle anxiety | You can stay calm, use distraction, and keep technique consistent | You faint, have severe panic symptoms, or can’t safely maintain control |
| Skin sensitivity | You can rotate sites and follow skin prep instructions | You have recurring severe reactions at injection sites |
FAQ
Can you administer B12 injections yourself safely?
Yes, many people can self-administer vitamin B12 when they’re prescribed the correct dose and route (IM vs. SC) and receive proper training on technique and needle/syringe handling. The safest path is confirming eligibility with your clinician and practicing with supervised instruction if you’re new.
What’s the difference between IM and SC B12 injections?
IM (intramuscular) injections are delivered into muscle and typically require a different needle approach than SC (subcutaneous) injections, which go into fatty tissue under the skin. Route matters for comfort, tolerance, and how reliably the medication is delivered.
What should I do if I miss an injection or feel unwell afterward?
If you miss a scheduled dose, follow your clinician’s or pharmacist’s plan for catch-up dosing. If you experience severe or rapidly worsening symptoms after injection (especially signs of allergic reaction), seek urgent medical help.
Conclusion: Your Practical Next Step
Self-injecting vitamin B12 can be manageable and safe when you have the right formulation, a clear IM/SC plan, correct supplies, and a repeatable technique. The most reliable way to build confidence is not trial-and-error—it’s structured training and a simple injection log so you can spot patterns in comfort and side effects.
Next step: Contact your prescribing clinician or pharmacy to confirm your exact B12 route (IM vs. SC) and ask for a one-time supervised injection training if you haven’t already.
Discussion